Bugs found in Clientary SaaS
Clientary SaaS is a centralized solution catering to freelancers, consultants, law firms, agencies, and businesses for efficient client workflow management.
Its wide range of features, including proposal handling, time tracking, and invoicing, streamlines daily tasks. The cloud-based accessibility adds convenience, allowing users to access critical business data from anywhere. Despite its rich feature set, navigating and working with Clientary is easy and intuitive. Users can enjoy the full benefits of Clientary SaaS without any cost or risk as there is no installation and no credit card required for the trial version.
QAwerk software testers explored Clientary SaaS from a professional standpoint and found several areas for improvement. Let’s go over the results!
"Any time" entered through calendar for any day is counted on current day
Severity:
Major
Precondition:
- Log in to the account.
- Add one client to CRM.
- Add a project for this client.
Steps to Reproduce:
- Click on the “Time” button in the side menu.
- Click on the “Calendar” button.
- Double-click on any date except the current one.
- Choose a project from the list.
- Fill in the “Task Summary” field.
- In the “Staff” field, select your profile.
- Fill in the Time Entry field (e.g., 12:00).
- Click on the “Add Time” button.
- Click once on the current day in the calendar.
- Look for just the “Add Time” entry in the list.
Environment:
Windows 10 Pro
Chrome v.114.0.5735.134, Firefox v.114.0.1, Microsoft Edge v. 114.0.1823.58
Actual Result:
“Add Time” entered through the calendar for any day is counted on the current day.
Expected Result:
Time entered through the calendar for any day should be counted on the day it was entered.
When user goes beyond signature field, window closes
Severity:
Major
Precondition:
Log in to the account.
Steps to Reproduce:
- Click on the “Proposals” button in the side menu.
- Click on the “+ NEW PROPOSAL” button.
- Scroll down to the last block with signers’ details.
- Click on the signature field.
- Start typing your signature by holding down the left mouse button on the field.
- While still holding down the left mouse button, move the pointer to the border of the field and release the button.
Environment:
Windows 10 Pro
Chrome v.114.0.5735.134, Firefox v.114.0.1, Microsoft Edge v. 114.0.1823.58
Actual Result:
When the user goes beyond the signature field, the window closes.
Expected Result:
A close warning should appear before closing the window.
No alert to save changes when switching from settings to other pages
Severity:
Major
Precondition:
Log in to the account.
Steps to Reproduce:
- Click on the “Settings” button in the side menu.
- Scroll to the “Theme Preferences” block.
- Click on the “Preview Theme” button.
- Change the current Theme to any other Theme.
- Click on the “Apply” button.
- Click on the “Time” button in the side menu.
Environment:
Windows 10 Pro
Chrome v.114.0.5735.134, Firefox v.114.0.1, Microsoft Edge v. 114.0.1823.58
Actual Result:
When switching from settings to other pages of the platform, there is no alert to save changes.
Since the settings page is long, it is not obvious that you need to scroll to the very bottom to save.
Expected Result:
When exiting the settings page, a warning should appear stating that changes will not be saved.
Chat button overlaps with invoice settings buttons
Severity:
Minor
Precondition:
- Log in to the account.
- Add one client to CRM.
- Add a project for this client.
Steps to Reproduce:
- Click on the “Dashboard” button in the side menu.
- Click on the “+ NEW INVOICE” button.
- Select a client from the list.
- Enter the data in the “ITEM DESCRIPTION” field.
- Enter the data in the “PRICE PER UNIT” field.
- Click on the “Save & View” button.
Environment:
Windows 10 Pro
Chrome v.114.0.5735.134
Actual Result:
The chat button is overlapping with the invoice settings buttons.
Expected Result:
The chat button should not overlap with the invoice settings buttons.
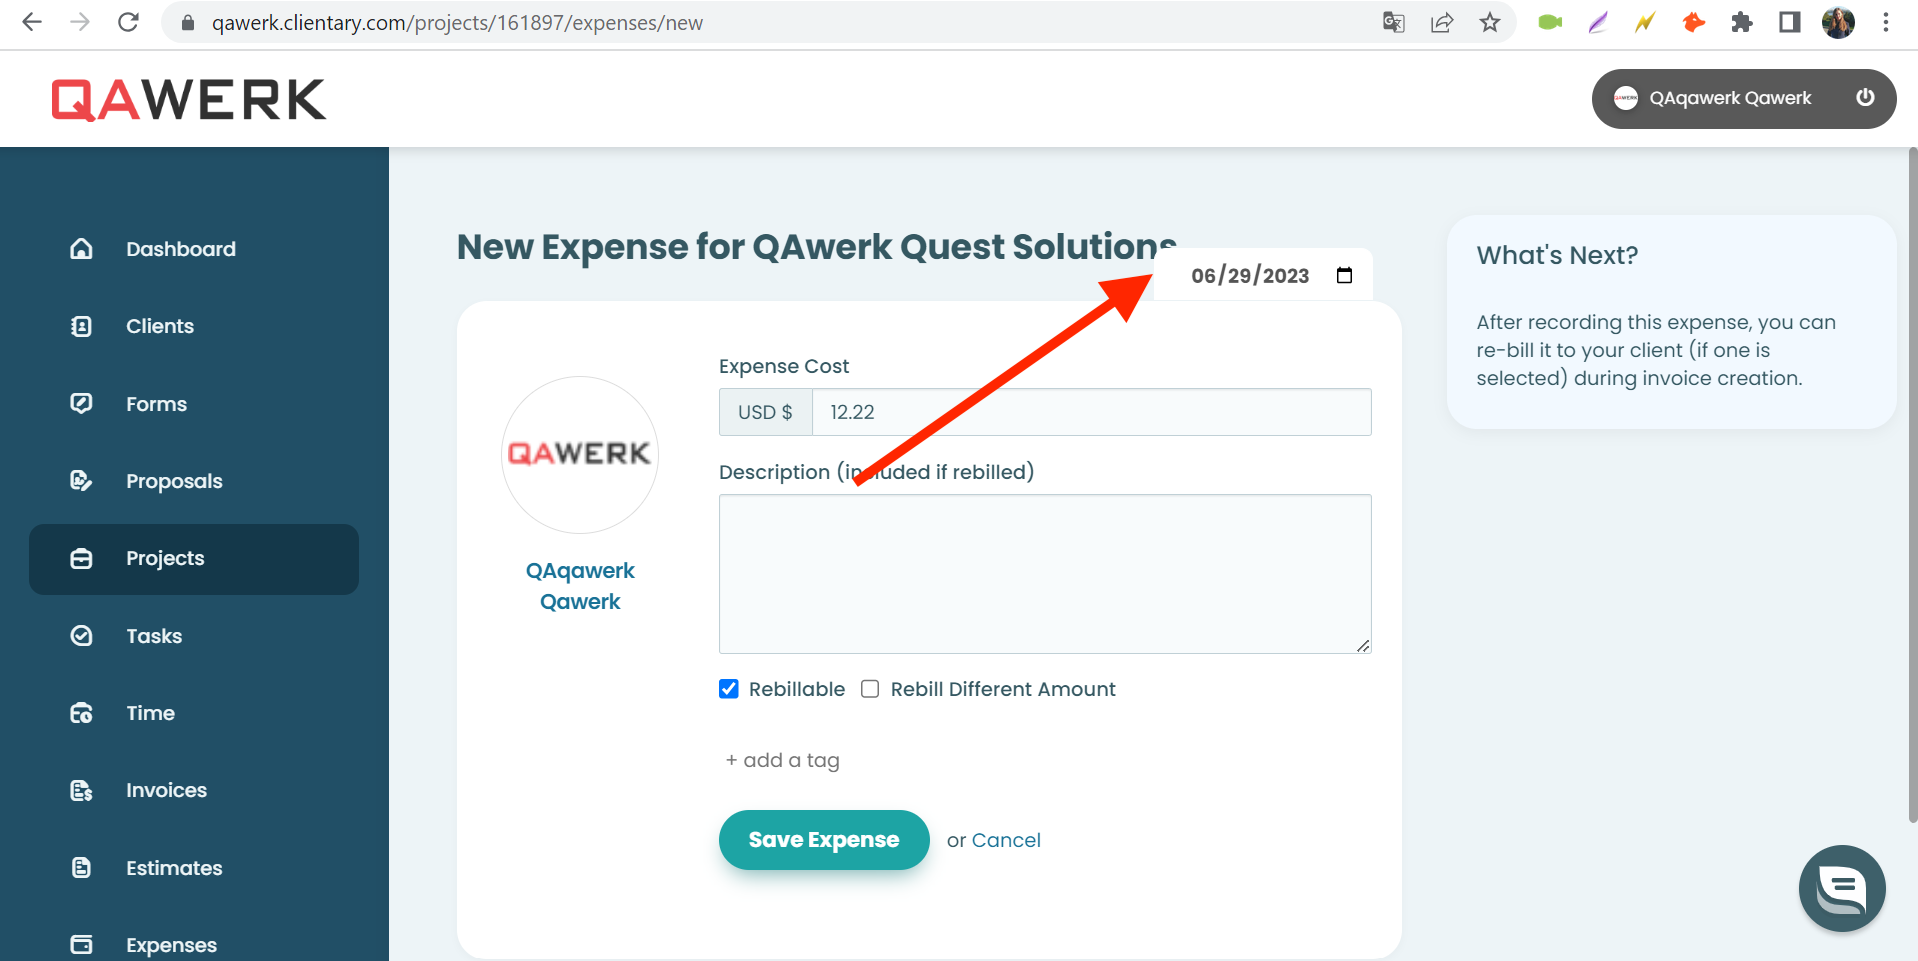
Date overlaps with project name
Severity:
Minor
Precondition:
- Log in to the account.
- Add one client to CRM.
- Add a project for this client.
Steps to Reproduce:
- Click on the “Project” button in the side menu.
- Click on the “+ NEW PROJECT” button.
- Select a client from the list.
- Enter a “Project Name” of 24 characters.
- Fill in the “Hourly Rate” field.
- Click on the “Create a project” button.
- Scroll down to the “Unbilled Expenses” block.
- Click on the “Log Expense” button.
Environment:
Windows 10 Pro
Chrome v.114.0.5735.134, Firefox v.114.0.1, Microsoft Edge v. 114.0.1823.51
Actual Result:
The date is superimposed on the project name.
Expected Result:
The date should not be superimposed on the project name.
Profile icon has low quality
Severity:
Minor
Precondition:
Log in to the account.
Steps to Reproduce:
- Click on the “Clients” button in the drop-down menu.
- Click on the “+ NEW CLIENT” button.
- Fill in the fields: Organization/Group Name, Contact Full Name, and Email.
- Click on the “Create Client” button.
- Click on the “People” button in the drop-down menu.
- Click on the profile of the created contact.
Environment:
Windows 10 Pro
Chrome v.114.0.5735.134, Firefox v.114.0.1, Microsoft Edge v. 114.0.1823.51
Actual Result:
The profile icon has low quality.
Expected Result:
The profile icon should be of high quality and free from any pixelation.
"Message" field can be expanded indefinitely
Severity:
Trivial
Precondition:
- Log in to the account.
- Add one client to CRM.
- Add a project for this client.
Steps to Reproduce:
- Click on the “Proposals” button in the side menu.
- Click on the “+ NEW PROPOSAL” button.
- Select a client from the list.
- Fill in the “Proposal Subject” field.
- Scroll to the bottom.
- Click on the “Save” button.
- Click on the send icon.
- Hold down the left mouse button on the lower right corner of the “Message” field.
- Pull the corner to the right.
Environment:
Windows 10 Pro
Chrome v.114.0.5735.134, Firefox v.114.0.1, Microsoft Edge v. 114.0.1823.51
Actual Result:
The “Message” field can be expanded indefinitely.
Expected Result:
The field should not go beyond the “Customize Recipients and Message” block.
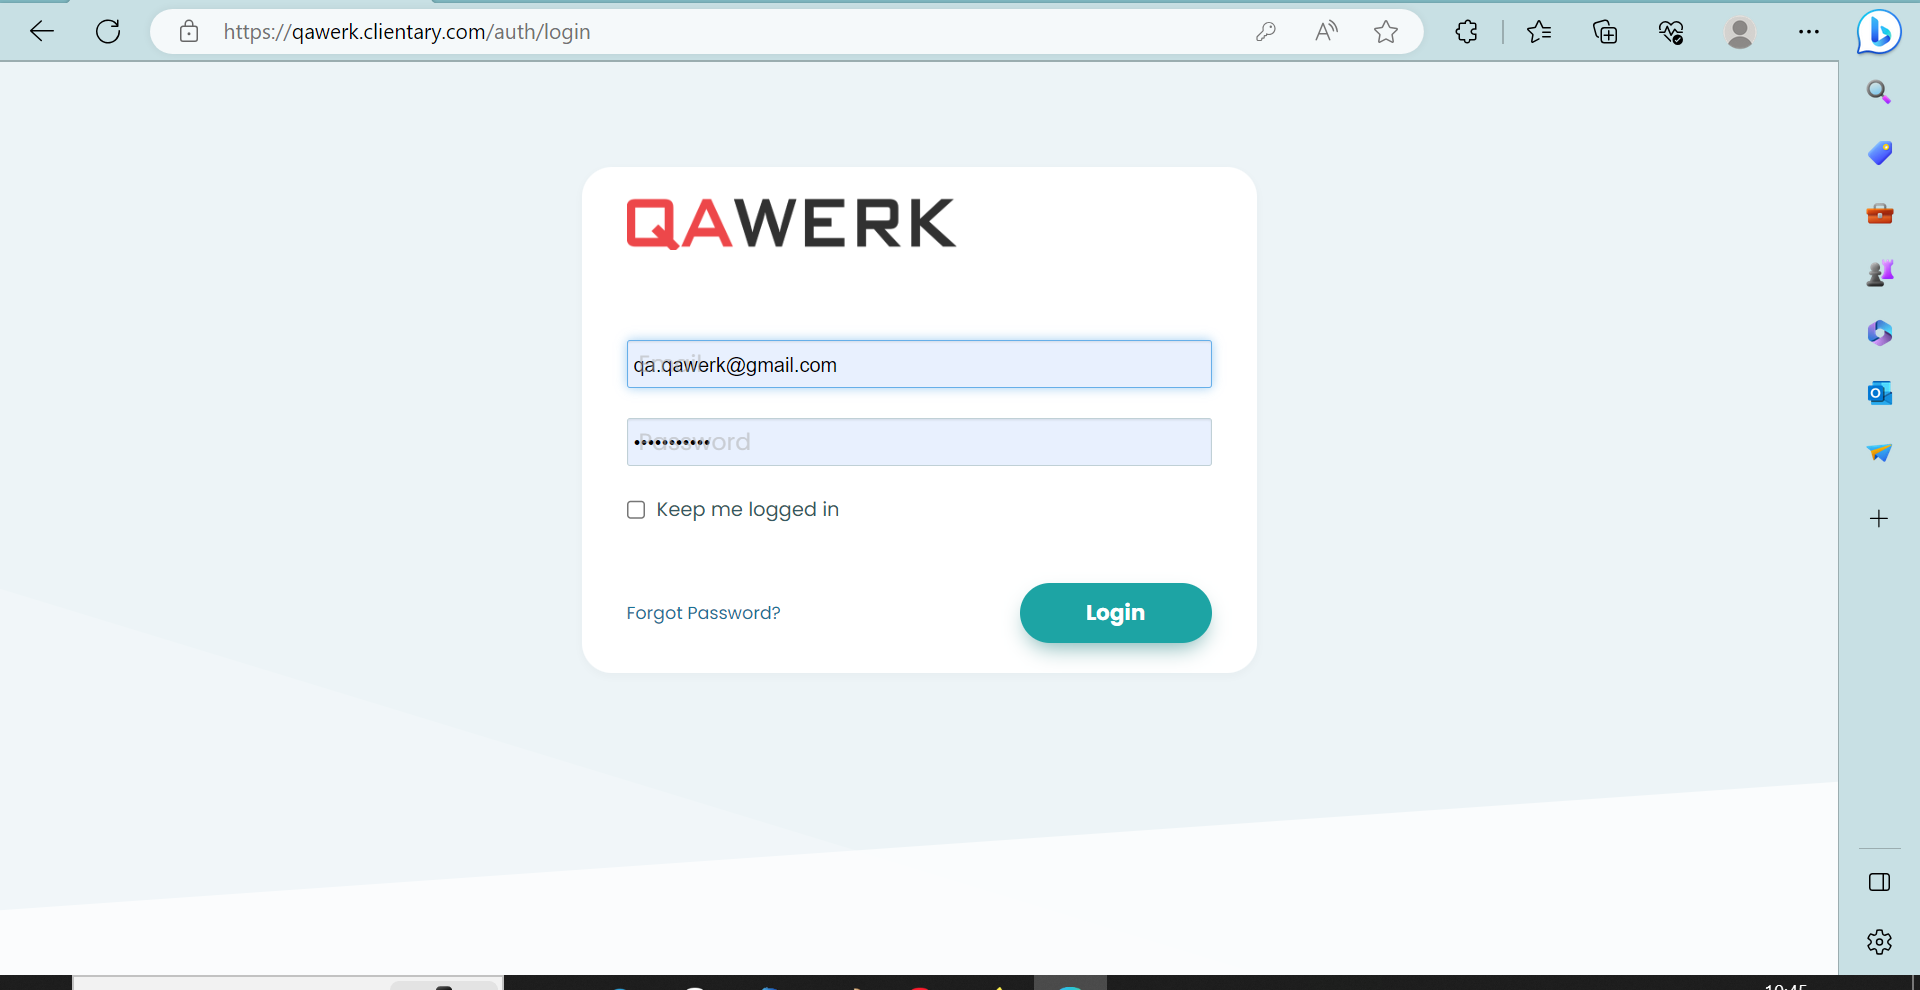
Autofill data is superimposed on placeholder on login screen
Severity:
Trivial
Precondition:
Register an account.
Steps to Reproduce:
- Click on the Logout button in the upper right corner.
- Enter your email and password.
- Click on the “Login” button.
- In the browser field that opens, click on the “Save” button to save the password in the browser.
- Click on the Logout button in the upper right corner again.
Environment:
Windows 10 Pro
Chrome v.114.0.5735.134, Firefox v.114.0.1, Microsoft Edge v. 114.0.1823.51
Actual Result:
The autofill data is superimposed on the placeholder on the login screen.
Expected Result:
The autofill data should not be superimposed on the placeholder on the login screen.
During testing, several bugs were identified. To ensure thorough testing, it is recommended to use both functional and non-functional testing tools, such as Selenium for regression testing and Apache JMeter for load testing, along with conducting usability and accessibility testing to improve the user experience.