Bugs found in Ringy SaaS
Ringy SaaS is a valuable tool that helps businesses streamline communication and optimize their processes.
The platform provides a wide range of functionalities, including scheduling appointments, managing leads, and tracking sales pipelines. The integration with popular calendar applications ensures smooth coordination and eliminates scheduling conflicts. Ringy SaaS offers powerful reporting and analytics, providing businesses with valuable insights into their communication and sales performance.
Our SaaS testing team got curious about Ringy, so we put it to the test. Read on to learn more about the bugs we found in this product.
Impossible to book slot for meeting
Severity:
Major
Precondition:
- Log into the account.
- Connect your Google Calendar to Ringy.
Steps to Reproduce:
- Click on the “Account Settings” button in the side menu.
- Click on the “Booking Page” button in the top menu.
- Fill the “Booking page link” field with random characters.
- Fill in the “Booking page title” field.
- Fill in the “Booking instructions” field.
- In the “Appointment duration” field, set the value to “Appointment length – 30 minutes”.
- Set the “Hours available for appointments” field to the range from 8:00 a.m. to 8:00 p.m.
- Scroll to the “Set your availability” block and select “Monday”, “Tuesday”, “Wednesday”, “Thursday” and “Friday”.
- Tick “email”.
- Check the box “Trigger an automated action when a new appointment is booked?” and select “Automated”.
- Check the box “Send my leads a confirmation email when they make an appointment?” and fill in the “Preset email subject” and letter fields.
- Scroll to the “Connect Google Calendar” block.
- Check the box “Save new appointments to my Google Calendar.” and choose your email.
- Click on the “Save Calendar” button.
- Follow the “Booking page link”.
- Choose any free slot in the calendar, for example Wed 6/7 7:00AM.
- Fill in the fields: “First name”, “Last name”, “Phone number”, and “Email”.
- Check the box indicating that you are not a robot.
- Click on the “Confirm appointment” button.
- Follow the “Booking page link” again.
- Go back to your account.
- Click on the “Google Calendar” button in the side menu.
- Click on the “Select calendars” dropdown and select your calendar.
- Check the date on which the reservation was made.
Environment:
Windows 10 Pro
Chrome v.113.0.5672.93, Firefox v.112.0.2, Microsoft Edge v.113.0.1774.35
Actual Result:
1. According to the “Booking page link”, the slot is still free.
2. The slot is also available in the Ringy account on the “Google Calendar” page.
3. The user who created the reservation did not receive an email.
Expected Result:
1. After booking on the “Booking page link”, the slot should be locked.
2. In the Ringy account on the “Google Calendar” page, the slot should contain data about the assigned meeting and must also become locked.
3. The user who created the reservation should receive an email.
When adding/removing "Reminder?" for two-day event, date and time are changing
Severity:
Major
Precondition:
- Log into the account.
- Connect your Google Calendar to Ringy.
Steps to Reproduce:
- Click on the “Google Calendar” button in the side menu.
- Click on the “Select calendars” dropdown and select your calendar.
- Click on any future date, for example, June 25.
- Fill in the “Add title” field.
- Set the value of the “Start date” field to 06/25/2023 and the time to 12:00 AM.
- Set the value of the “End date” field to 06/25/2023 and the time to 12:00 AM.
- Check the box for “Use default Google Calendar timezone.”
- In the “Select calendar” dropdown, choose your calendar.
- Click on the “Save Event” button.
- Click on the newly created event.
- Check the box for “Reminder?”.
- Enter the value for the “Minutes before event” field as in example 22.
- Click on the “Update Event” button.
- Click on the event again.
- Remove the check mark for “Reminder?”.
- Click on the “Update Event” button.
- You may need to repeat steps 11 through 16 several times.
Environment:
Windows 10 Pro
Chrome v.113.0.5672.93, Firefox v.112.0.2, Microsoft Edge v.113.0.1774.35
Actual Result:
When adding/removing “Reminder?” for the two-day event, the date and time are changing.
Expected Result:
The date and time of the event should not change when adding a reminder, unless these changes were made manually.
Adding reminder for event creates additional event with random time and date
Severity:
Major
Precondition:
- Log into the account.
- Connect your Google Calendar to Ringy.
Steps to Reproduce:
- Click on the “Google Calendar” button in the side menu.
- Click on the “Select calendars” dropdown and select your calendar.
- Click on any future date, for example, June 23rd.
- Fill in the “Add title” field.
- Set the value of the “Start date” field to 06/23/2023 and the time to 11:00 AM.
- Set the value of the “End date” field to 06/23/2023 and the time to 12:00 AM.
- Check the box for “Use default Google Calendar timezone.”
- In the “Select calendar” dropdown, choose your calendar.
- Click on the “Save Event” button.
- Click on the newly created event.
- Check the box for “Reminder?”.
- Enter the value for the “Minutes before event” field as in example 22.
- Click on the “Update Event” button.
- Click on the event again.
- Remove the check mark for “Reminder?”.
- Click on the “Update Event” button.
Environment:
Windows 10 Pro
Chrome v.113.0.5672.93, Firefox v.112.0.2, Microsoft Edge v.113.0.1774.35
Actual Result:
When adding “Reminder?” for the event, another event is added with a random time and date.
Expected Result:
When editing events, new events should not be created.
Impossible to edit scheduled meeting
Severity:
Major
Precondition:
- Log into the account.
- Create at least one lead.
Steps to Reproduce:
- Click on the “Leads” button in the side menu.
- Click on the phone number of the created lead.
- Click on the “Meetings” button.
- Click on the “Schedule Meeting” button.
- Click on the “Create Meeting” button.
- Click on the meeting editing button.
- Change the values of the “Start time” fields.
- Click on the “Update Meeting” button.
Environment:
Windows 10 Pro
Chrome v.113.0.5672.93, Firefox v.112.0.2, Microsoft Edge v.113.0.1774.35
Actual Result:
It’s impossible to edit the scheduled meeting.
Expected Result:
It should be possible to edit an already assigned meeting.
Drop-down list stays on screen when scrolling
Severity:
Minor
Precondition:
Log into the account.
Steps to Reproduce:
- Click on the “Leads” button in the side menu.
- Click on the “States” drop-down list.
- Scroll down the page.
Environment:
Windows 10 Pro
Chrome v.113.0.5672.93, Firefox v.112.0.2, Microsoft Edge v.113.0.1774.35
Actual Result:
The drop-down list stays on the screen when scrolling.
Expected Result:
The drop-down list must be attached to the field it belongs to.
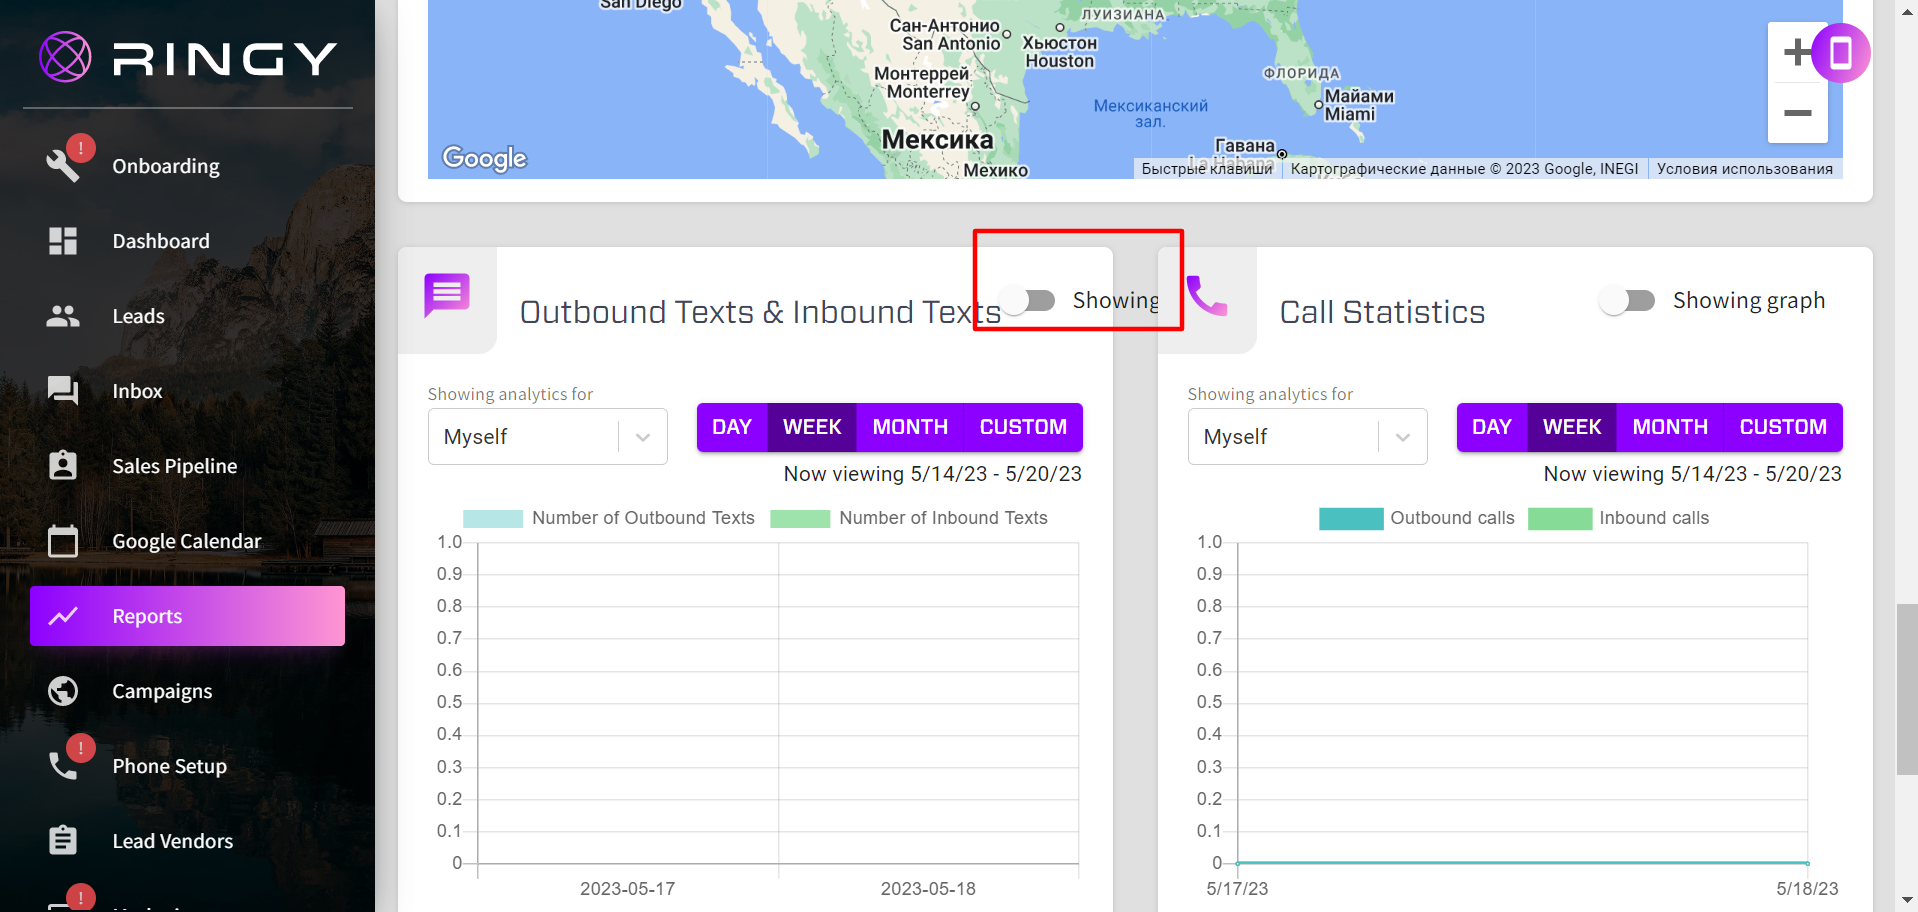
Text for sweater does not fit within field
Severity:
Minor
Precondition:
Log into the account.
Steps to Reproduce:
- Click on the burger button in the upper left corner to pin the side menu.
- Click on the “Report” button in the side menu.
- Scroll down the pages to the “Outbound Texts & Inbound Texts” block.
Environment:
Windows 10 Pro
Chrome v.113.0.5672.93, Firefox v.112.0.2, Microsoft Edge v.113.0.1774.35
Actual Result:
The text for the sweater does not fit within the field.
Expected Result:
The switcher and its text must fit within the field.
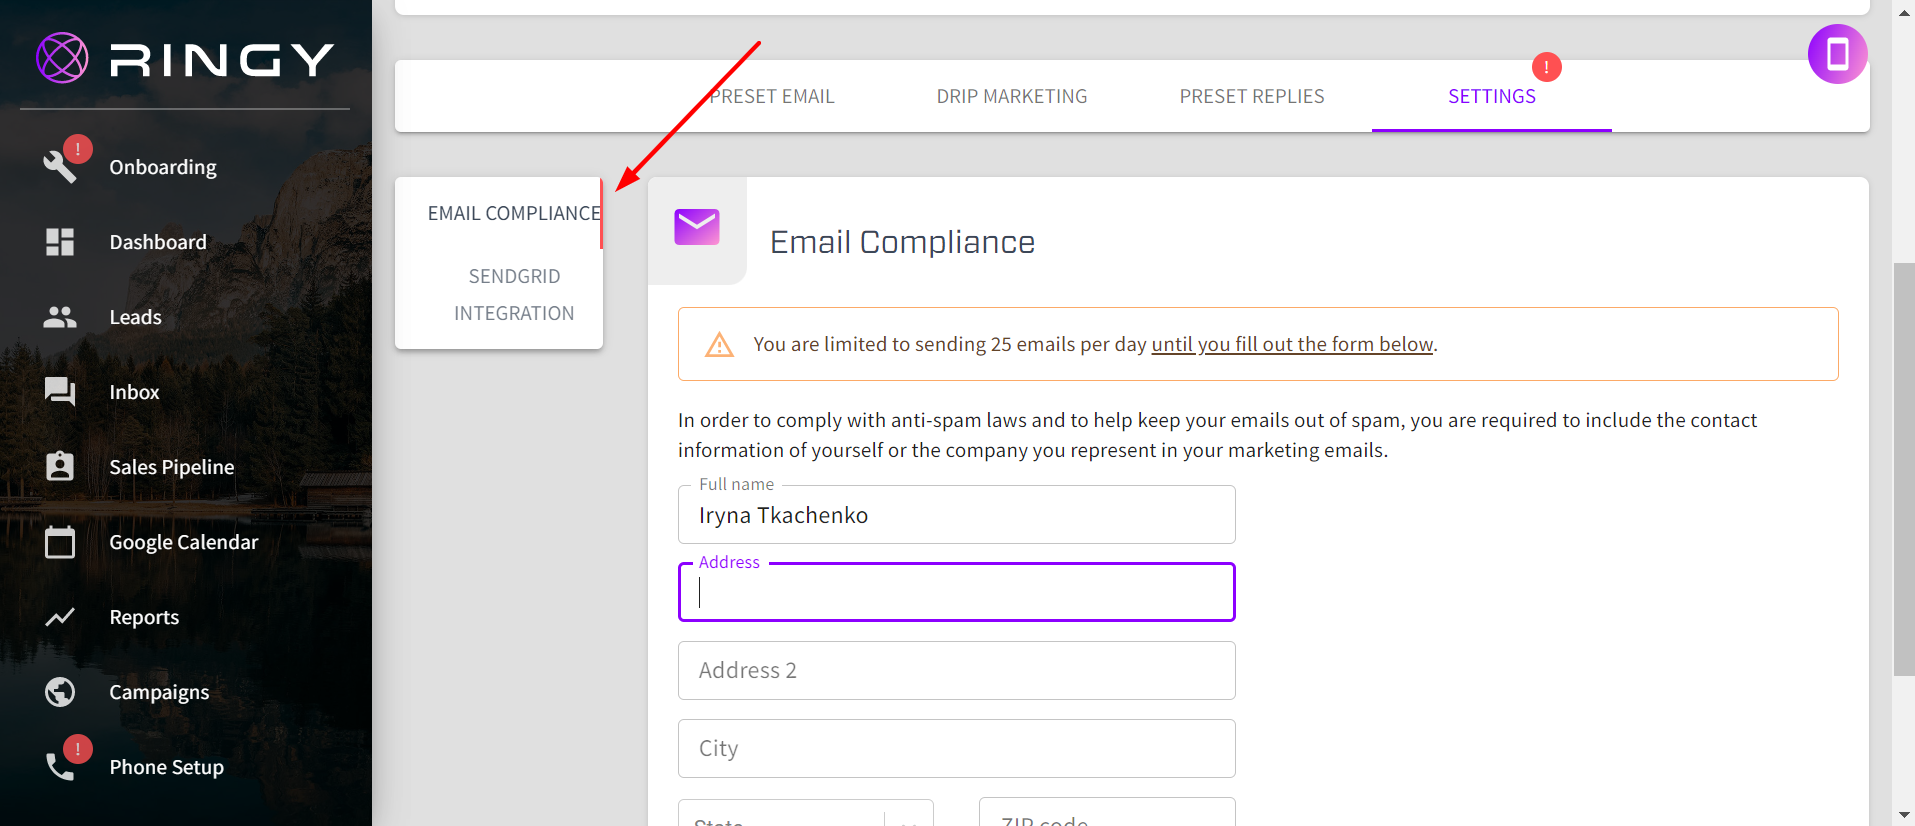
"Email Compliance" button is not indented to right
Severity:
Trivial
Precondition:
Log into the account.
Steps to Reproduce:
- Click on the burger button in the upper left corner to pin the side menu.
- Click on the “Marketing” dropdown in the side menu.
- Click on the “Email” button in the side menu.
- Click on the “Settings” button.
Environment:
Windows 10 Pro
Chrome v.113.0.5672.93, Firefox v.112.0.2, Microsoft Edge v.113.0.1774.35
Actual Result:
The “Email Compliance” button is not indented to the right.
Expected Result:
The “Email Compliance” button should have equal indentation on both the right and left sides.
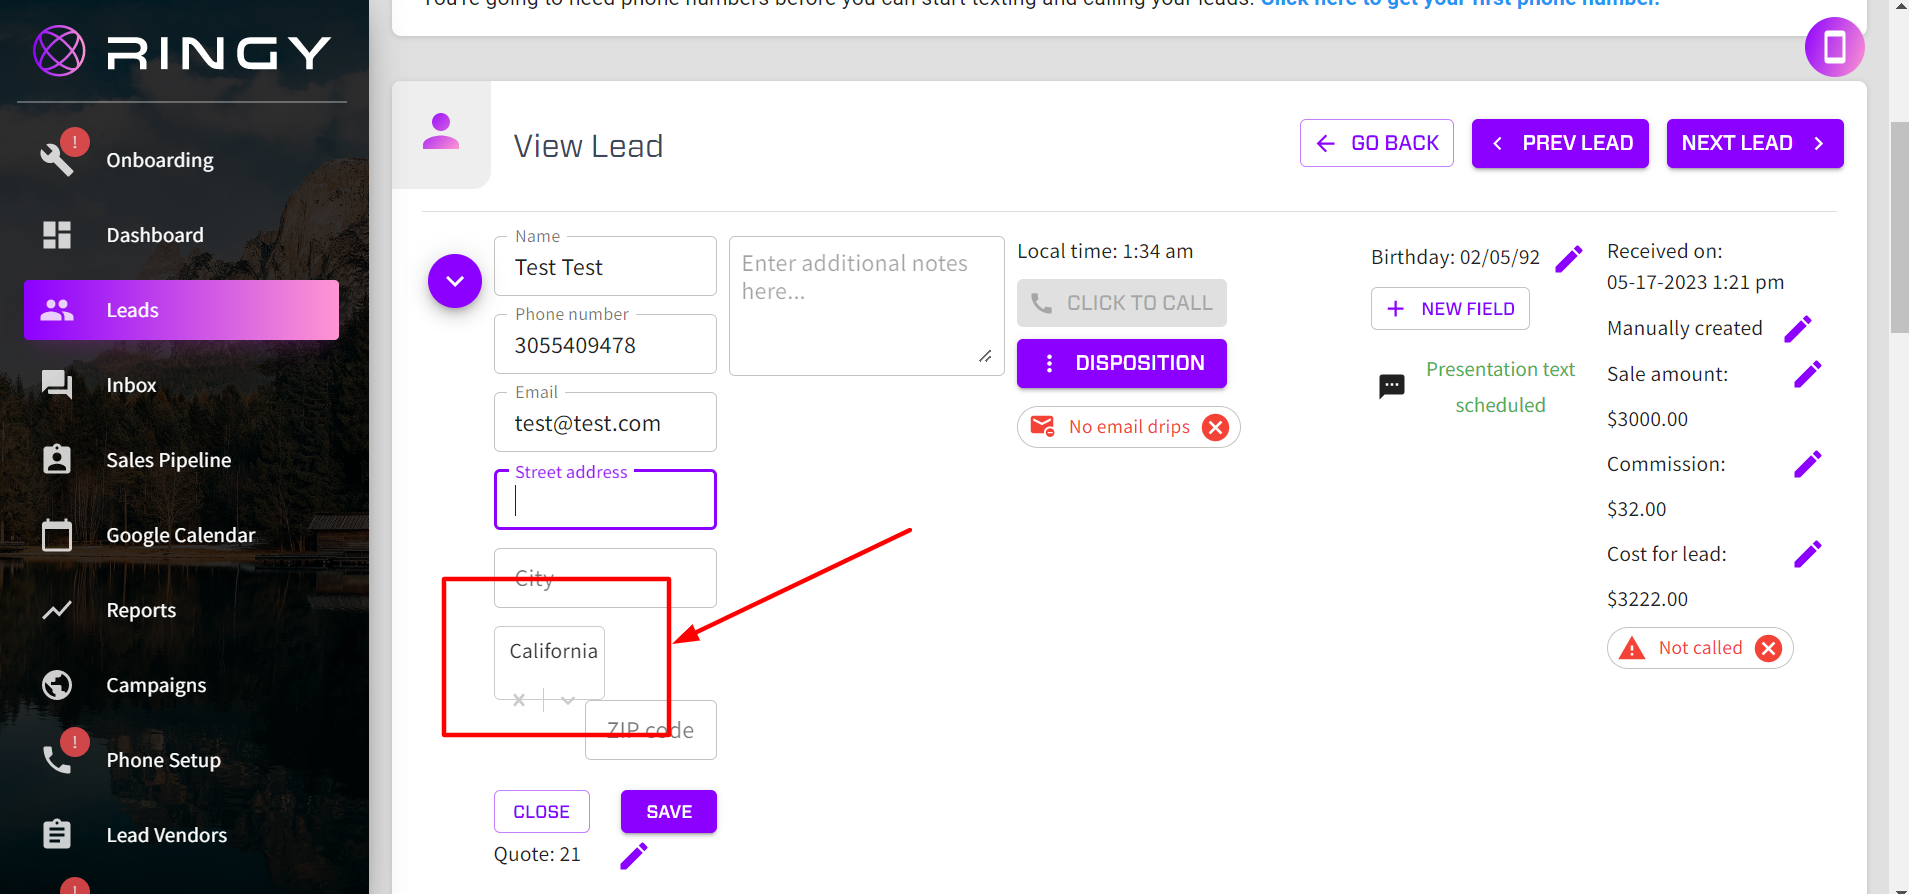
When selecting state for lead, field buttons extend beyond box
Severity:
Trivial
Precondition:
- Log into the account.
- Create at least one lead.
Steps to Reproduce:
- Click on the burger button in the upper left corner to pin the side menu.
- Click on the “Leads” button in the side menu.
- Click on the phone number of the created lead.
- Click the edit button next to “Lead Name”.
- Click on the “State” dropdown and select any state.
Environment:
Windows 10 Pro
Chrome v.113.0.5672.93, Firefox v.112.0.2, Microsoft Edge v.113.0.1774.35
Actual Result:
When selecting a state for the lead, the field buttons extend beyond the box.
Expected Result:
The buttons should not move.
During testing, several bugs were found, including issues with meeting slot booking, adding/removing event reminders, editing scheduled meetings, and drop-down list and field alignment glitches. I recommend conducting thorough testing of each module, including Leads, Sales Pipeline, and Campaigns, to ensure their proper functionality and integration.